Make a Scale Replica of the Ark of the Covenant
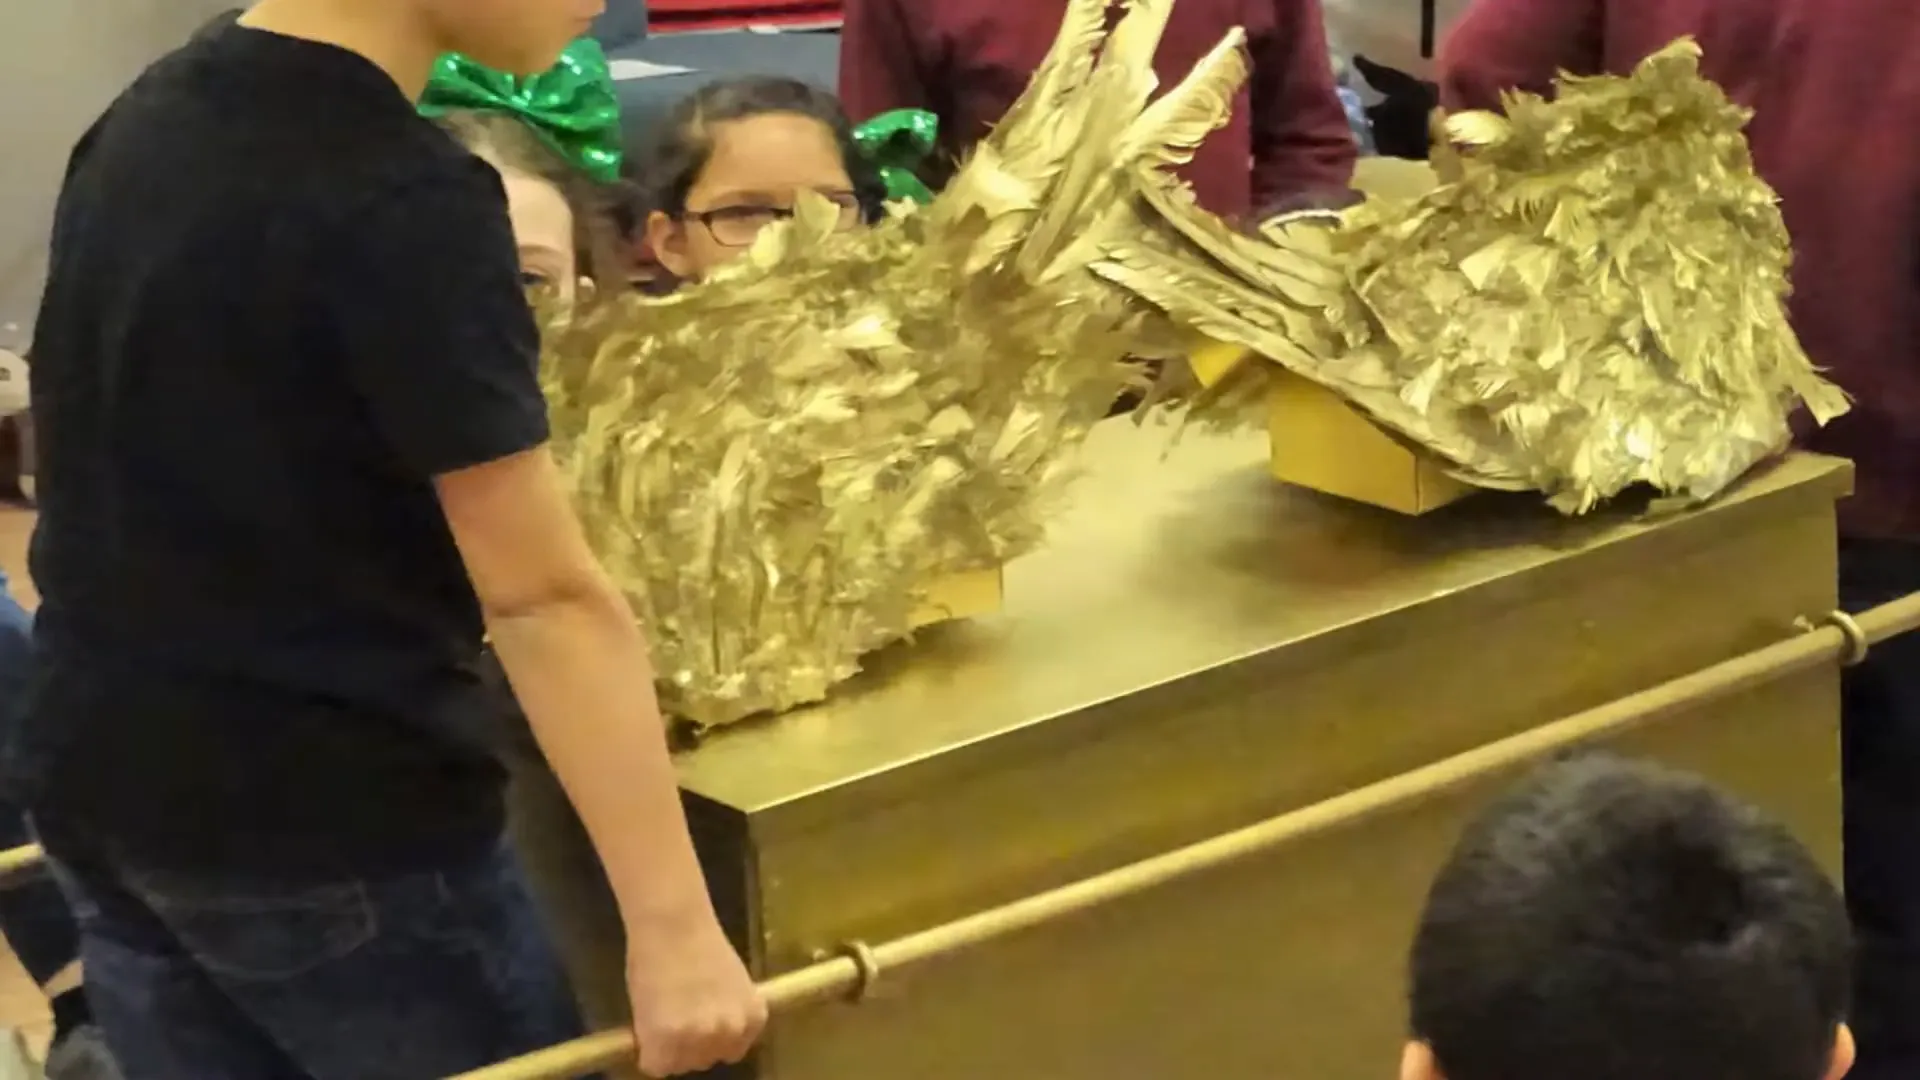
Are you in need of a realistic-looking Ark of the Covenant for your classroom, church, or VBS? It's easier to make than you might think! In this post, I'll guide you through how to construct the box itself. Plus, stay tuned for the next post where I'll show you how to make the cherubim that sit on top of the mercy seat.
Understanding the Dimensions
All the rectangular furniture in the tabernacle was measured in cubits, traditionally defined as the length between the elbow and the tip of the middle finger. While forearm lengths can differ greatly, it is generally accepted that a cubit is about 18 inches in length. In Exodus 20:5, God instructed Moses to make an ark two-and-a-half cubits long, one cubit and a half wide, and a cubit and a half tall. This results in a box approximately:
45 inches long
27 inches wide
27 inches high
Using a Piano Bench as a Shortcut
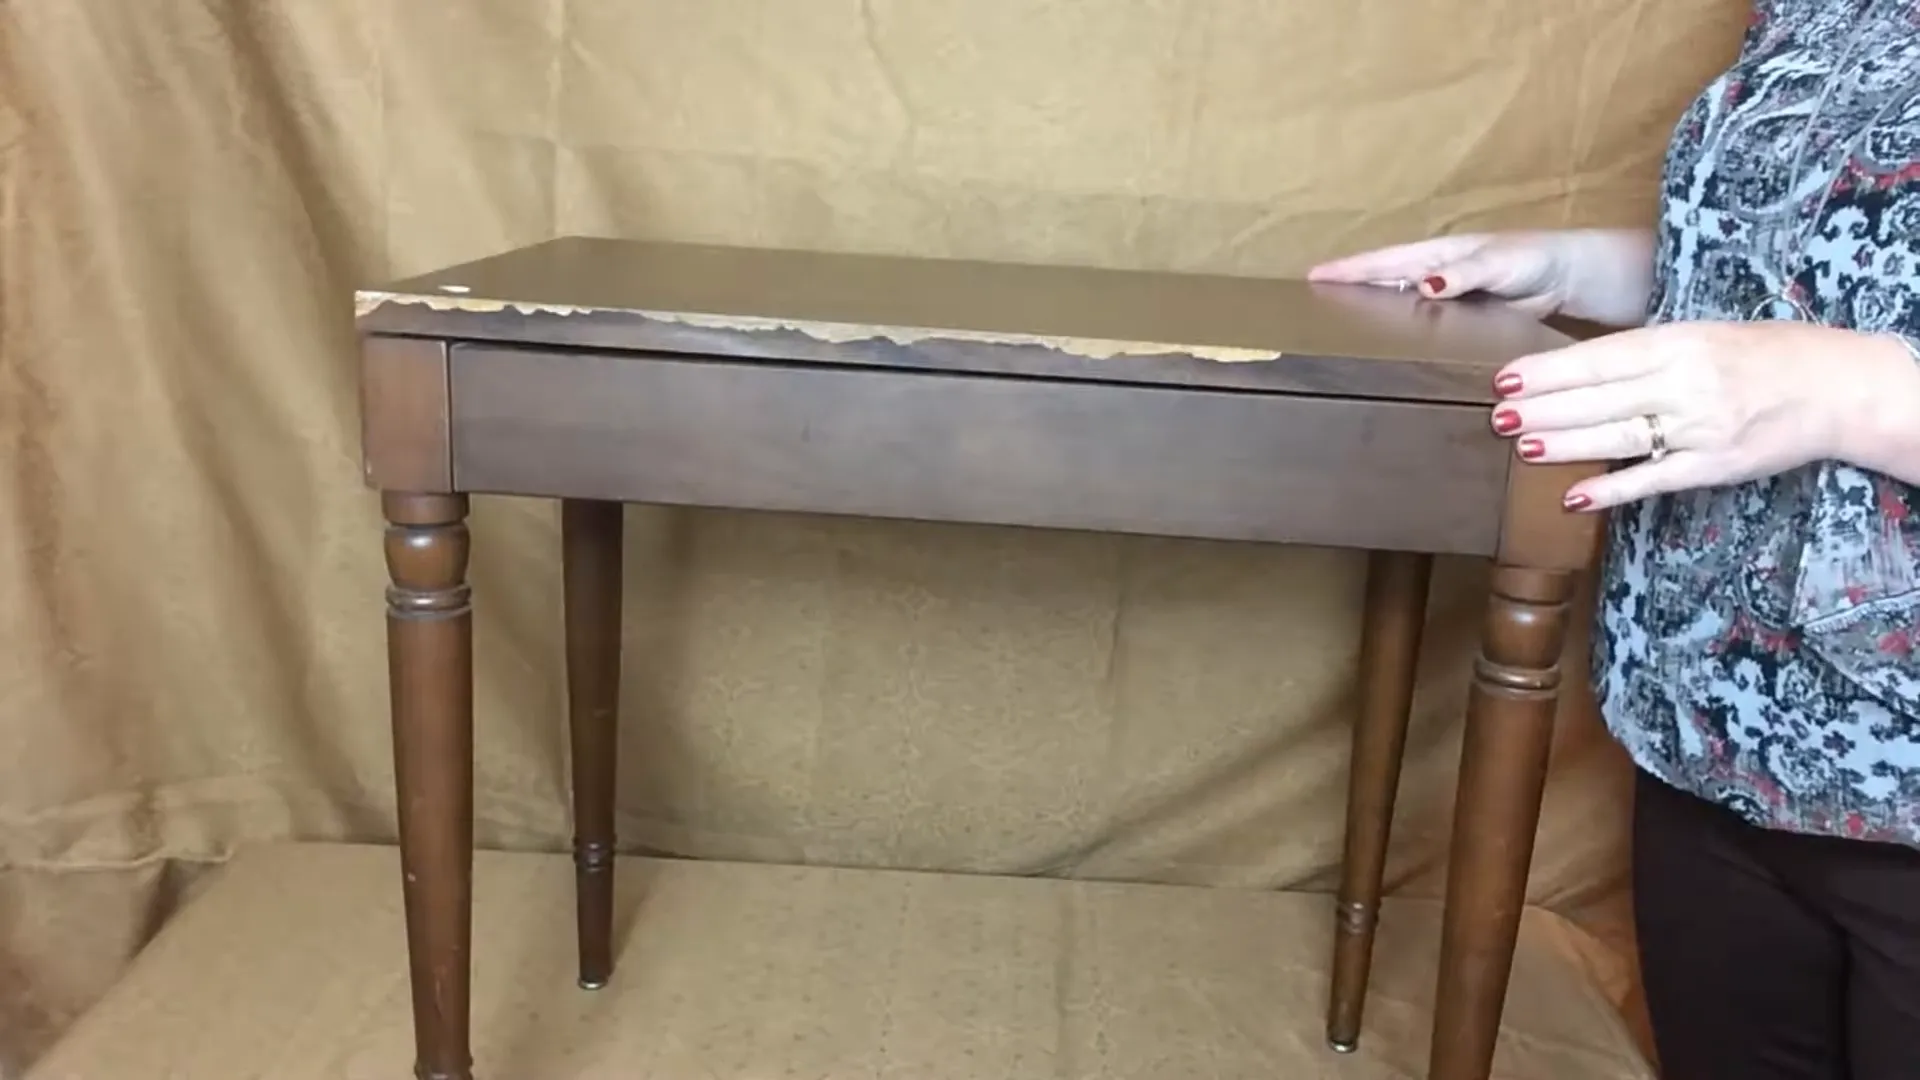
Now, I'm not a carpenter, and if you're not either, I have a great shortcut for you: a wood piano bench! Many churches have an old piano bench sitting in storage somewhere. It doesn't need to look pretty because it will be covered and painted. The benefits of using a piano bench include:
- A lid for the mercy seat
- An interior area to place the three contents of the Ark
- Ready-made legs and a solid base for adding the sides
Using a standard size piano bench will create a 3/4 size Ark of the Covenant, which works just fine for most purposes.

Preparing the Bench
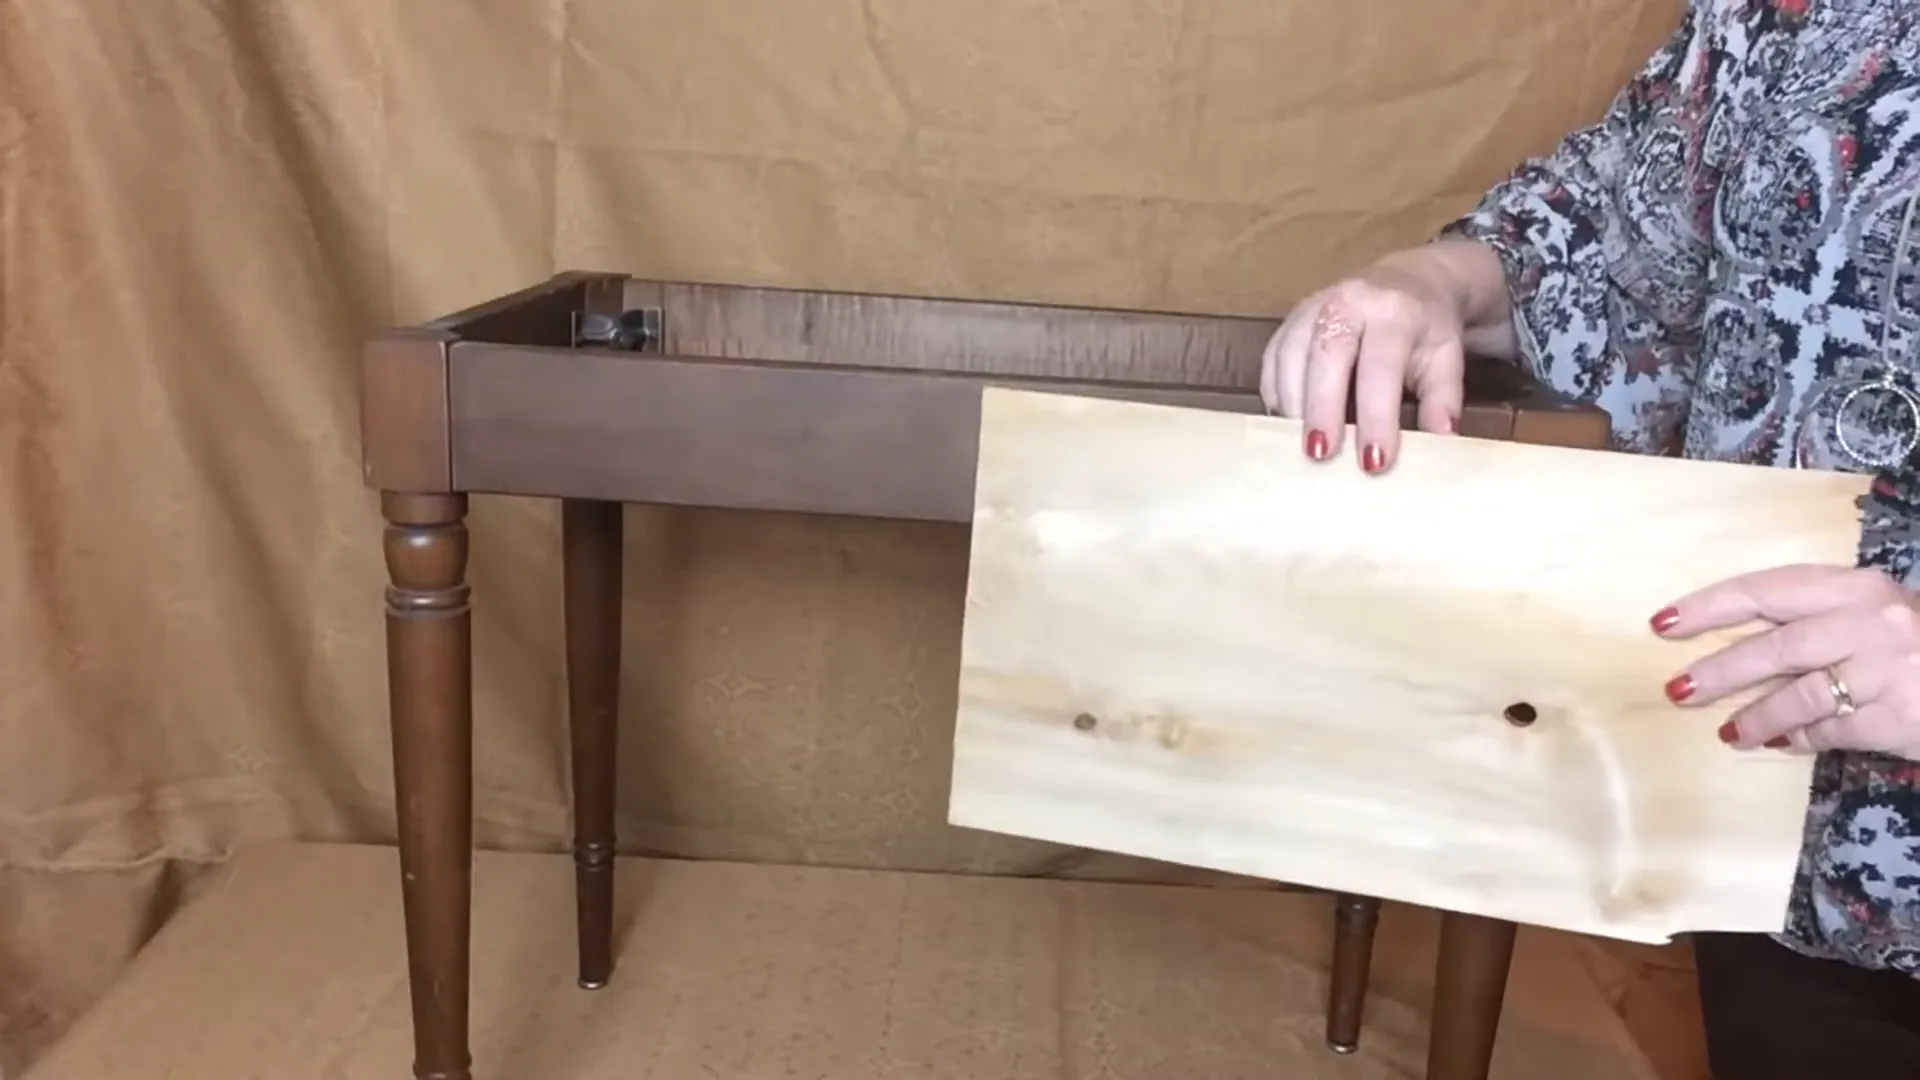
First, unscrew the lid from the base and remove all connecting hardware to have two completely separate pieces. You might want to fill any obvious holes with wood filler and let it dry. Now let's focus on the box itself.
Covering the Box
Once your bench is ready, you have several options for covering it. Wood is the most durable and authentic-looking option, but there are easier and faster methods as well. If you choose wood, some simple straight cuts using scrap wood will cover your bench. Remember, students love to help carry the Ark as they pretend to be Levites!

To add more authenticity, you can add four large eye hooks and two strong dowels to the sides of your bench. I recommend using dowels that are greater than one inch in diameter and 48 inches in length. Anything smaller may cause the dowels to bow under the weight of the Ark. The eye hooks screw in fairly easily, especially if you drill a starter hole. If it becomes difficult, use a screwdriver for leverage.

Painting the Ark
For a shiny finish, I like to use metallic gold spray paint, but you can certainly brush on paint as well. Just find the most brilliant gold you can! If you don't want to take the time to cut wood or if you want to give your older students a fun project, there are several lightweight materials that can be cut with scissors or a utility knife to cover your Ark.
Students can use their measuring and cutting skills to cover the sides of the piano bench with gold wrapping paper, gold or yellow poster board, or foam board. Glue or sticky dots will hold these materials on. At this point, you could also add eye hooks by drilling right through the paper.

Final Steps
And there you have it—a simple base for your Ark of the Covenant! In the next post, I’ll show you another shortcut to make the cherubim. It’s easier than it looks, so please check it out!
This is Becky from Experience the Bible Creatively, reminding you that props are always better than paper.
Help Your Students Fall in Love With the Bible
Teach the Bible with what you know it can have: powerful, effective, life-changing impact. Whether you’re looking for homeschool Bible curriculum, Christian school classroom curriculum, Vacation Bible School (VBS), or kids Bible study content, we’re here to help your students experience the Bible creatively.
Shop CurriculumAre you teaching on the Tabernacle or through the book of Exodus? Find Curriculum or rent props specially designed to point your students to Jesus as they learn about the Tabernacle!
